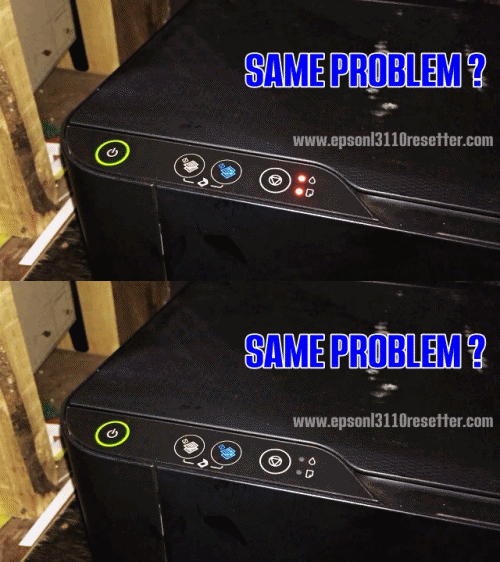
Service Required?
Are you going to reset EPSON L3210, L3215, L3216, L3250, L3251, L3260, L5290, and L1210 printers now? Before resetting, it is very important to know what the problem is with the printer. If you are a technically inexperienced user, first take a look at the GIF image and video that we have provided Below.

These images and videos clearly show how to identify the problem. Please start the reset process only after a thorough inspection.
To safely get your printer working again, these steps must be followed.
After identifying the problem, you need to download a tool called “Epson L3215, L3216 Resetter” or “Adjustment Program”.
We have provided this tool for you on this website. So, please locate and click the Download button to download it.
Note: This tool works only on Windows based PC or laptop.
Therefore, you will need to use a Windows computer.
Here is an easy step-by-step process. reset your EPSON L3210, L3215, L3216, L3250, L3251, L3260, L5290, and L1210 printer. If you are unable to reset, please Contact us via Whatsapp – +91 8985252512
Follow these easy steps:
Open the AdjProg file
- Run the file and the “Epson Adjustment Program” window will appear on the screen.
Click the Accept button
- Click the “Accept” button.
Click the ‘Select’ button
- In the new window, click the button called “Select”. Do not change any other options.
Select your Printer Model Name
- After clicking the “Select” button, select your printer model from the dropdown menu.
(Ex: If you are using L3215 or L3216, select L3210)
Select Printer Port
- After selecting the printer model, also select the port. Otherwise, you can leave it on Auto Selection.
Click on the OK button
- Now click on the OK button.
Click on Particular Adjustment Mode
- Now click on the button called “Particular adjustment mode”.
Select Waste Ink Pad Counter
- In this window, select the option called “Waste Ink Pad Counter” and click OK.
Tick and click the Initialize button
- In the new window, tick the Main pad counter, Platen pad counter, and Ink system pad counter boxes.
- Then click the Check button – it will show 100% full.
- Tick three more times and click the Initialize button.
Click the OK button
- Click OK after initialization is complete.
Initialization is done
- The printer will reset immediately after clicking OK.
Restart the printer
- A message saying “Please turn off the printer” will appear.
- Turn the printer OFF and then ON again.
Now you have successfully reset your printer!
Now the printer is ready to work normally again.
